

Instagram is one of the most powerful platforms to connect with your audience as an online business. With Instagram pushing their shopping features, connecting your products to your account is a must-do. But what if you don’t have physical products? No worries – Instagram allows you to sell digital products on your account too! Here’s a breakdown of how to sell digital products on Instagram.
Need digital product inspo?
Get my FREE list of 50+ digital product ideas (no matter your business, niche, etc) and get started on your digital product journey!
Instagram is really pushing its shopping features these days – and you should capitalize on that! The less clicks it takes to learn about and buy one of your products, the more likely someone is to buy it. Let’s dive into how to sell digital products on Instagram!
How to Sell Digital Products on Instagram
Step 1: Connect your Instagram and Facebook Accounts
Like most things these days, Facebook and Instagram are connected. You need to have a business Facebook page connected to your Instagram account to set up and manage your shop. Here are some quick instructions on how to make that happen!
Step 2: Navigate to Your Shop on Facebook
Full disclosure – the Hey Jessica team went through this process about two weeks ago, and the Facebook page manager interface has totally updated since then and could anytime in the future. This walkthrough shows how to manage a shop as of July 13, 2022 and it should be similar regardless of what your page looks like!
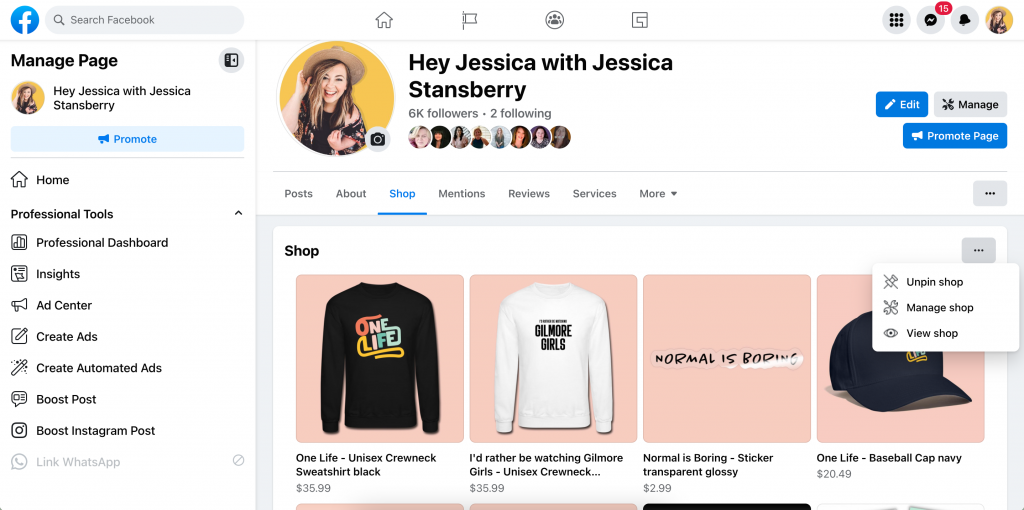
Like I mentioned, you’ll need to complete this process over on Facebook. Navigate to your page manager and then to the “shop” tab. If you haven’t set up a shop before, there will be a button that says “create your shop.” You can find more details about how to do that from scratch right here.
Once you’re on the shop tab, click the three buttons in the top right corner and select “manage shop.”
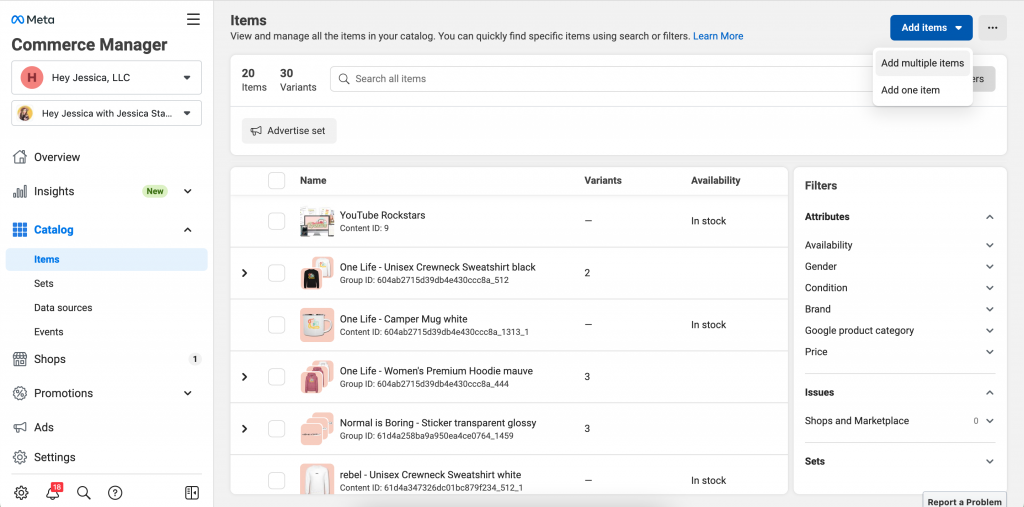
From there, select the “Items” tab and then click the blue “Add Items” button in the top right corner. Select “add multiple items” and get ready for the good stuff!
Step 3: Add Items to Your Catalog
At this step, select the “data feed” option.
This is where the magic happens and you choose which products get added to your shop! The easiest way to keep everything up-to-date is by using a data feed. You compile all of the products you want people to shop on your Instagram into a spreadsheet. Then, Facebook pulls all of that data and formats it into your shop!
Facebook is great about walking you through this entire process. At this step, select the “No, I need a feed template” option and Facebook will give you a template to download to input your data! You’ll want to download the standard template. I prefer to upload it to Google Sheets and edit it from there because it’s super easy to add to Facebook.
Here’s what it looks like with the sample product from Facebook:
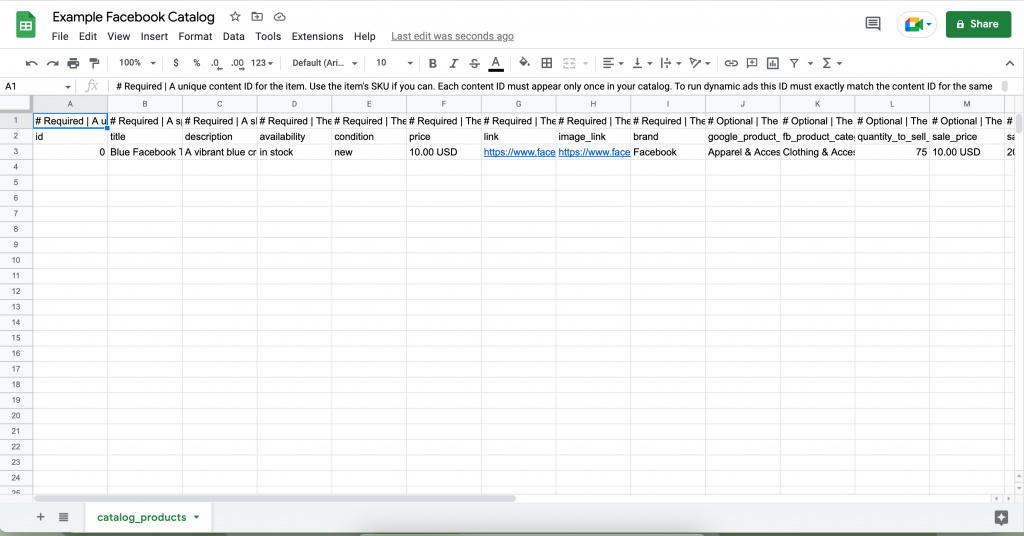
You’ll want to go through and complete all of the categories labeled “Required.” You’ll give each product a unique SKU number (which you can totally make up if you don’t track your products this way!), a title, a price, and a description.
Then, you’ll be asked to provide a link to the product and a link to the product image. If you’re selling a course or digital product, you can link to your sales page here! The product image that you use MUST be visible on the sales page or else it won’t show up in the listing.
Tip: You can right click on any image on your sales page and click “copy image address” to grab the link for the spreadsheet!
We found that most of the optional categories weren’t relevant to our digital products or courses, so we left them blank. We did add a Google product category – you can find those options right here!
Now you’re ready to upload.
Grab my FREE 5 Day Podcast Series 5 Things to do THIS WEEK to Grow Your Small (or new) YouTube Channel!
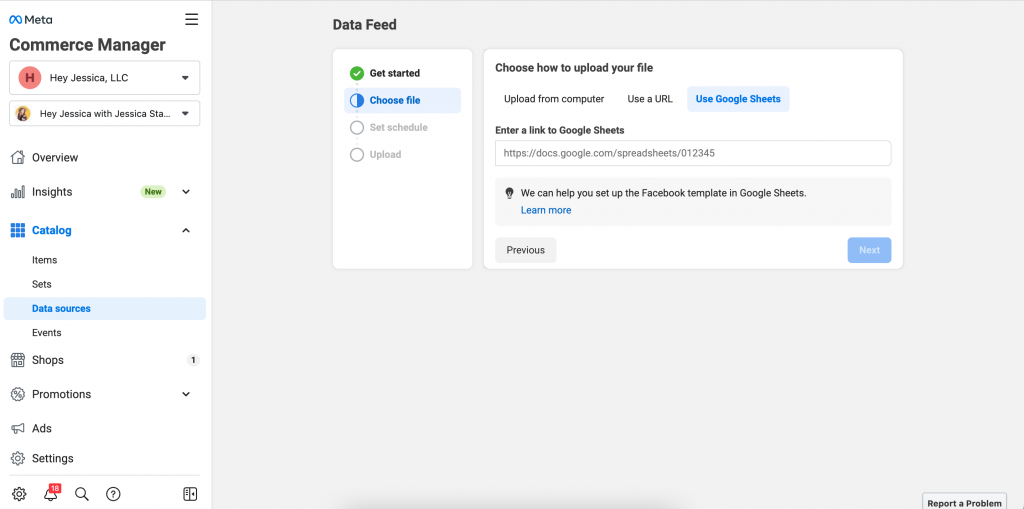
Step 4: Upload Your Data Source
Now to complete the process, you can upload your data source. Google Sheets is the best way to manage your products because you can just insert a link to your spreadsheet! This also allows for Facebook to automatically update your shop when you edit the spreadsheet. If you’re using a different software, you’ll want to save the file in the .CSV format and then upload.
Facebook will prompt you to select an update schedule. This will determine how often Facebook looks at your spreadsheet and make updates to your shop. You can choose a timeline that makes the most sense for your products and their availability.
Now you've done the hard part! Facebook will take a few minutes to comb through your data and make the magic happen.
Step 5: Format your Shop and Enjoy!
You can edit the order or look of your shop by heading over to the “shop” tab and making any changes you'd like. Facebook and Instagram will automatically optimize which products are shown first to which people based on their shopping habits, which is super helpful!
Here's what your shop could look like now…
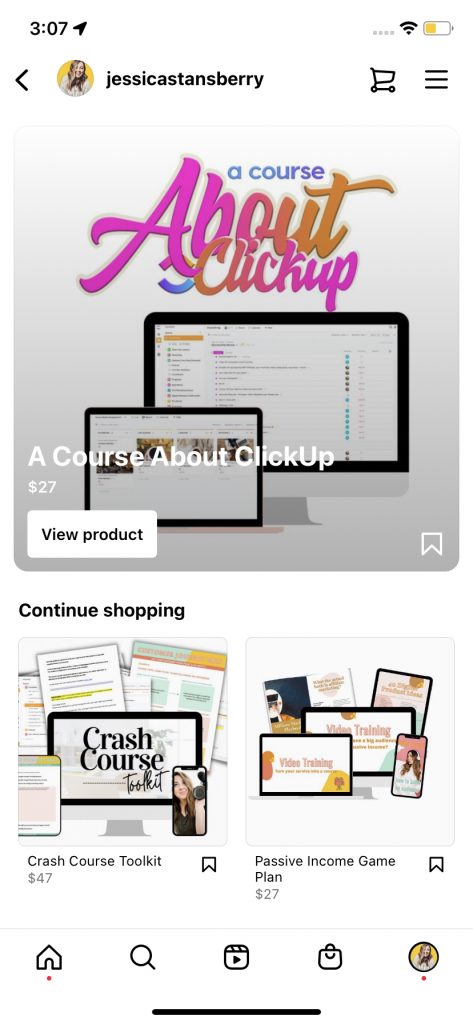
It’s really that simple! If you weren’t sure how to sell courses and digital products on Instagram, now you can sit back, relax, and let your followers shop!


+ show Comments
- Hide Comments
add a comment