

If you use Instagram for your business, then you KNOW the importance of scheduling your posts and planning your feed. Scheduling your posts gives you more freedom and helps you maintain consistency on the platform! Our scheduling tool of choice is PLANOLY – and I’m breaking down exactly how to use PLANOLY in this post.
How to Use PLANOLY
So, you’re starting to take your Instagram strategy seriously – but coming up with captions on the fly just isn’t working for your brain. And when you save them in notes, you forget to hit “post” at the best time.
PLANOLY was the answer to ALL of those problems for the Hey Jessica team, and I would totally recommend trying it out for yourself. There are pricing plans to fit whatever your needs are, and it is absolutely worth it!
Let’s dive into the tutorial.
Planning Content on PLANOLY
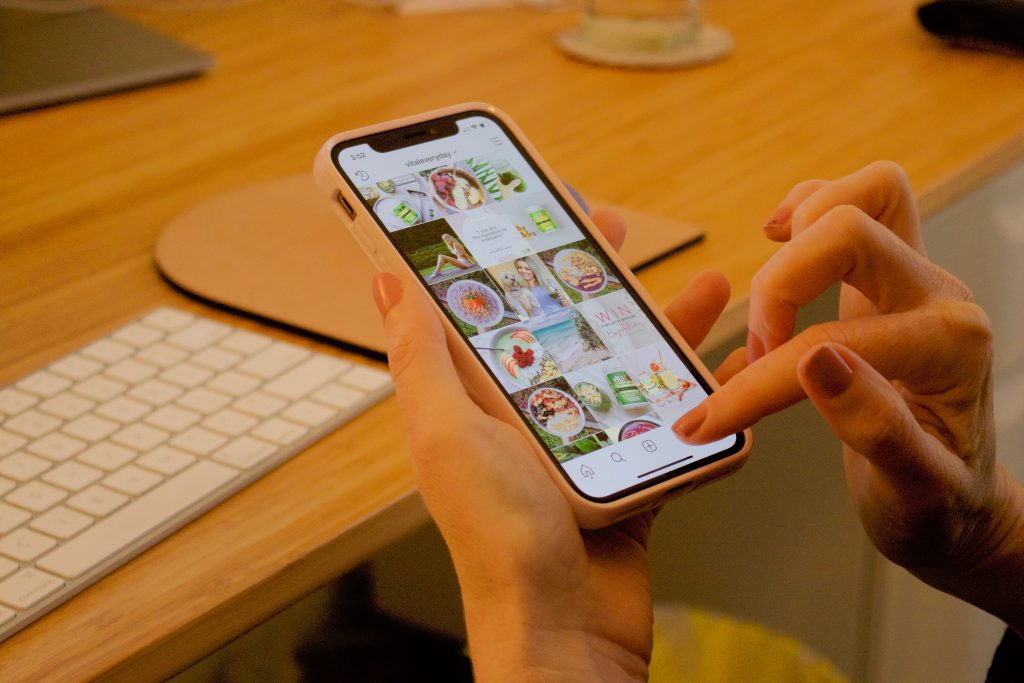
One of the best features of PLANOLY in my opinion is the option to use the desktop or mobile version to schedule posts! I prefer to schedule on desktop because it’s easier for me to type captions, but it’s totally up to you!
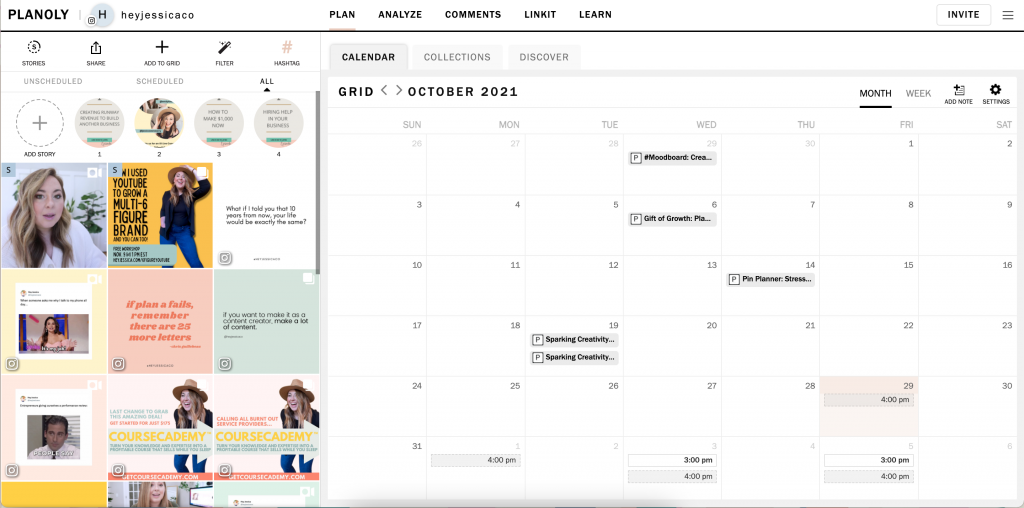
PLANOLY connects straight to your Instagram feed and will let you preview your most recent posts in the scheduling tool. Then, you can choose to add “placeholder” posts or your actual content. Maybe you know what you want to post on Monday and Friday of next week, but not Wednesday. To get an accurate view of your feed you can add a placeholder for Wednesday and see if the posts match your aesthetic as they are!
If you already know the image that you want to use, you can drag and drop it into the PLANOLY desktop app and upload it that way. You can add multiple images at once and choose whether to make them a carousel post or individual posts. And you can plan videos (rumor has it they’re introducing a Reels Planner soon, too).
Adding Captions
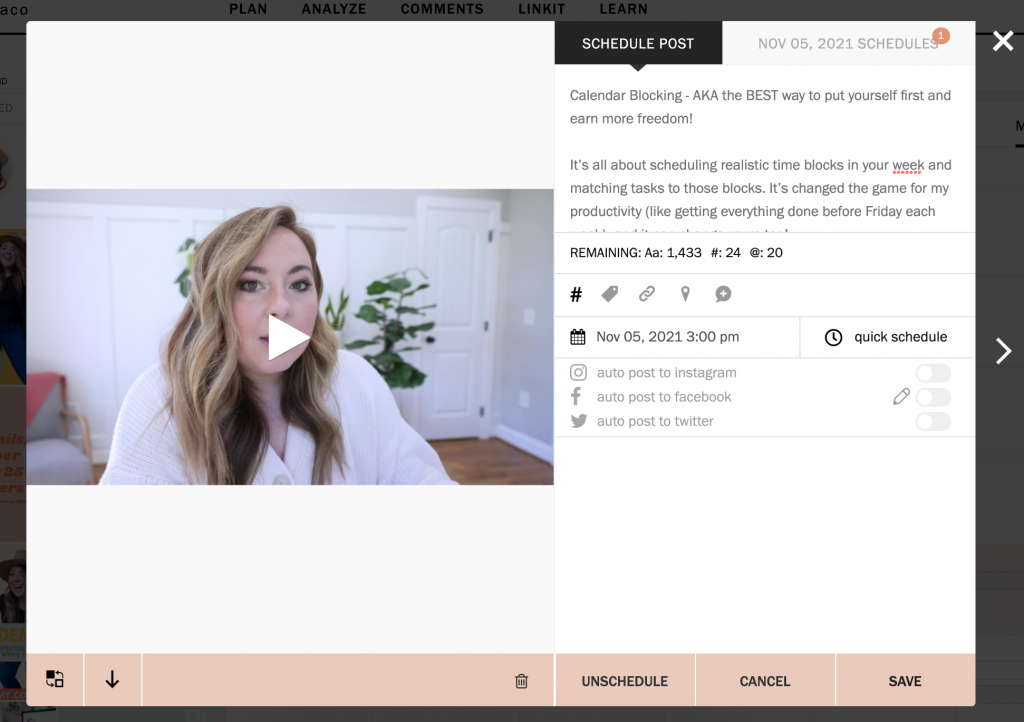
Once your images are uploaded, you can click on them to add captions. You’ll also have the option to add hashtags directly to the post here from your hashtag bank! (More on that later).
Pro tip – if you’re using a Mac and want to add emojis to your post, just press Ctrl + Cmd + Space and the emoji menu will pop up!
Scheduling Posts on PLANOLY
PLANOLY has a built-in calendar view so you can visually see when your posts are scheduled. You can drag and drop draft posts on to a date and then select a time, or choose both from within the post editing menu.
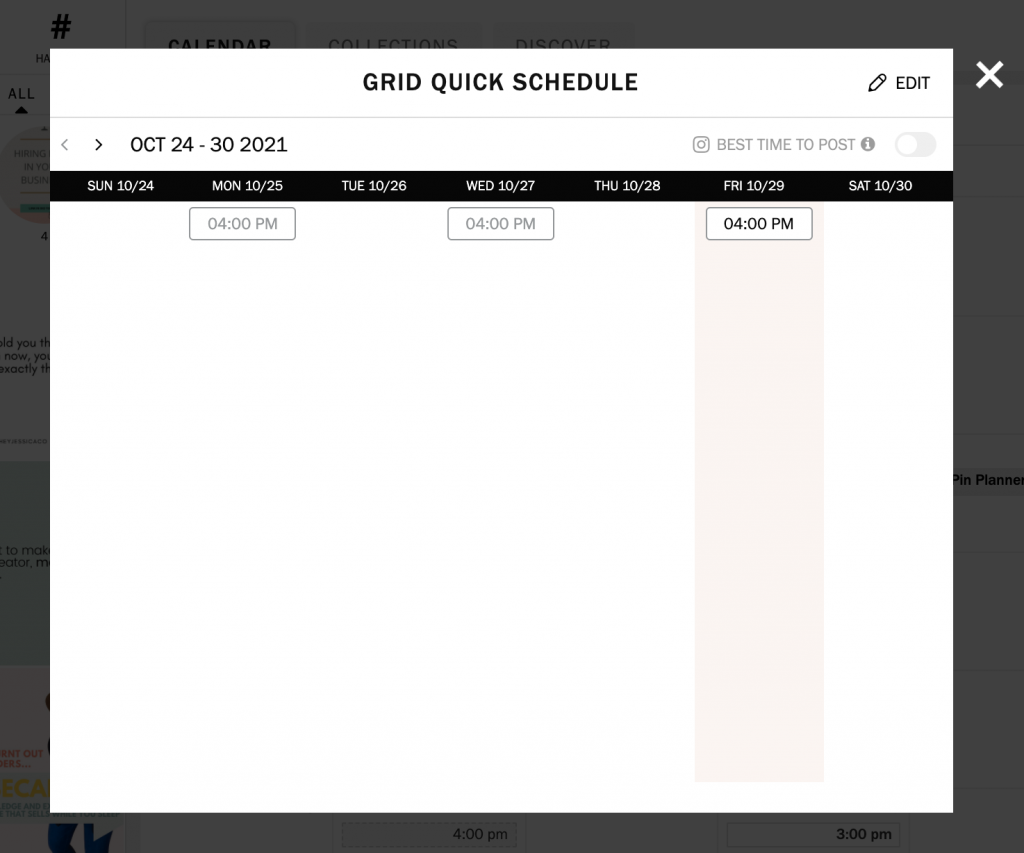
You can also add a “quick schedule” option – set a standard time and day of the week you like to post, and PLANOLY will automatically add that time as a blank spot on the calendar. Then, you can drag and drop your posts onto it and have the time and date automatically scheduled!
Once the date and time are scheduled, PLANOLY will send a push notification to your phone to remind you to post. You’ll be taken to the PLANOLY app, where the image will be saved to your phone, the caption will be copied, and then you just go into Instagram to do the rest.
Note: there is an auto-post feature on PLANOLY, but Instagram will ALWAYS like it more when you post yourself!
Hashtag Bank
We all know that hashtags are one of the most important pieces of Instagram strategy. In PLANOLY, you can create and save multiple hashtag banks for your account and add them to each post!
On the mobile app, just go to “account,” “settings,” and “hashtags” to set them up. On the desktop site, click the “hashtags” button in the top right hand corner of the feed preview section.
Scheduling Stories
PLANOLY also allows you to schedule stories, which is PERFECT if you like to use stories to promote time-sensitive info or just want to organize your information before you post it! Just click the “Add story” button on desktop or the “Plan Stories” button on mobile to make it happen.
And that’s it – a basic guide on how to use PLANOLY! Try it out for yourself right here.


+ show Comments
- Hide Comments
add a comment