

Editing is one of the things that holds people back from creating video content. Whether it’s the time commitment, the actual process, or people not thinking they’re good at it. So I want to walk you through how I edit my YouTube videos, and share some time-saving tricks with you!
How I Edit my YouTube Videos + Time Saving Tricks!
Want to watch the video version of this post? I’ve got you covered!
I’ve been editing videos for a pretty long time now, and I’ve learned the workflow to how I edit my YouTube videos is the best for me. It’s funny, because as I film this video, I was just looking to hire a video editor earlier today (because I’m going back to 2 videos per week in September, which is super exciting!).
But I didn’t have the money to hire a video editor when I first started out, so I taught myself THESE time-saving tricks to make editing work for me! If the idea of editing is stopping you from posting video content, I hope this will help calm some of your fears.
Get my 5 Day Podcast series!
Download my FREE podcast series and learn:
- 5 things you can do THIS week to grow your channel
- How these tips apply to you no matter if you have a current channel or if you're just starting out
- An easy-to-do action item each day to get your channel in tip-top shape
Use software that is integrated with your operating system!
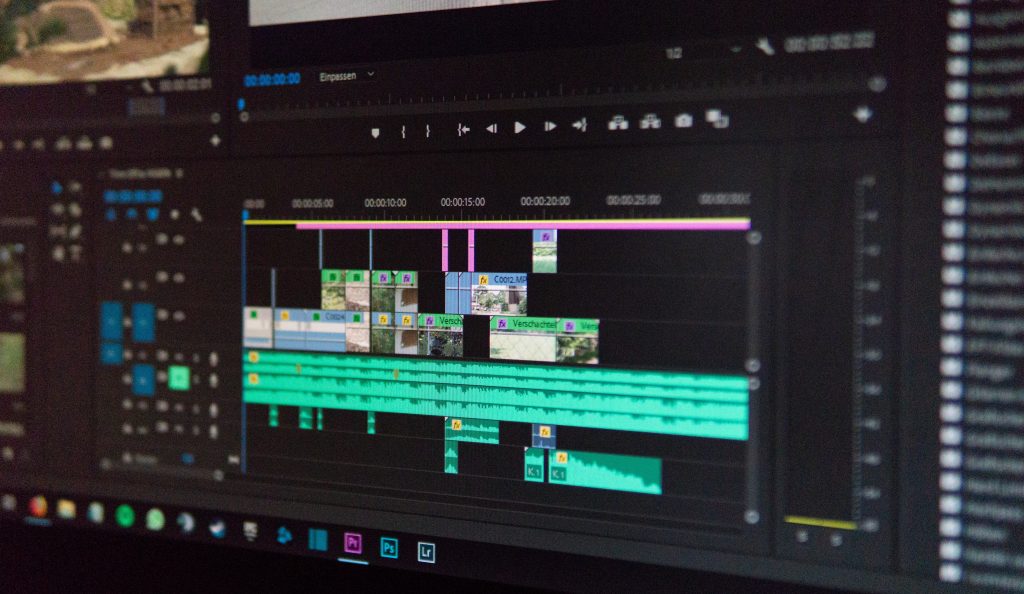
I currently use Final Cut Pro. I was a Premier girl FOREVER, but back in December I got Mac M1 Mini computers for my assistant and I, and I got a new Sony A7S III camera. WIth both of those changes, Premiere just wasn’t cutting it. So I switched to Final Cut Pro and haven't looked back! It runs a LOT faster on my computer, and it’s able to manage massive file sizes much better.
If you’re on a Mac and Premiere Pro isn’t working for you, look into Final Cut Pro. But I used iMovie for YEARS and there’s nothing wrong with that, either! It just has some creative constraints that I didn’t want to work around anymore.
If you’re on a PC… I’m sorry, but I can’t personally recommend any software.
I actually made one other change during that time period – to use an external hard drive to store footage.
Store footage on an external hard drive
I had never stored my video footage on an external hard drive before. But again, when I got my new camera, the file sizes increased astronomically. So storing the footage on my computer was taking up WAY too much space.
In my business, we use Dropbox to share files and sync Dropbox to everyone’s desktop. BUT that means it still takes up space on your computer to put things in Dropbox – since you have to sync it to your desktop to open the file.
I was filling up my computer space super quickly! So we made the switch to editing off of ALL external hard drives. I use the LaCie hard drives and LOVE them. Since the only purpose is to edit videos, Final Cut Pro doesn’t struggle to store projects or open the video files.
If you’re struggling to edit footage, I would highly recommend grabbing an external hard drive! I’ve even been able to edit on my 2016 Macbook using an external hard drive, which is AMAZING.
Use Proxy files to make editing more efficient
Again, massive file sizes over here thanks to my new camera. And to actually be able to edit efficiently and quickly, I had to start using proxy files. Proxy files are essentially lower resolution copies of your original files that you can use to make editing high definition files quicker! The footage in an editor isn’t jumping or freezing up. But then, when you export the files, it exports the same edits on the larger file!
Creating proxy files in Premiere or Final Cut Pro takes forever. But I promise, the actual editing process once they’re created makes it worth it!
I have a system down where the proxy file creation doesn’t inhibit my workflow too much. If you’re having difficulties scrubbing your videos in an editor, look up how to use proxy files on whatever editing software you’re using. You’ll be glad you did!
I’ll tell you what I do while the proxy files are being created in just a second.
The Logitech MX Master 3 Mouse
I saw people RAVING about this Logitech mouse for editing, and so I had to try it out. I have been a Magic Mouse user for as LONG as I can remember, but this mouse is actually AMAZING for editing.
It’s ergonomic, rather than flat like the Magic Mouse. But the main benefit is that it has a BUNCH of buttons. It has scrolly wheels (so that you can scroll to the left and right like you would with a Magic Mouse) and tons of other programmable buttons. Like 4 customizable ones.
The buttons are programmable for EACH PROGRAM that you use it in. Which means you can set specific buttons doing certain things for Final Cut Pro. I have one of my side buttons set to cut my footage so I don’t even have to use a keyboard shortcut.
Mouse or not, learn your keyboard shortcuts
If you don’t want to purchase a specific mouse, LEARN the keyboard shortcuts of your editing software. They’ll save you a ton of time in the long run.
Create and use templates every time you edit
Creating templates that I use on the regular is a massive time saver for me! It means I’m not constantly hunting for graphics or sounds that I use all the time.
I have my intro music, mouse clicks, a popping noise, title cards, transitions and more saved so that I can access them quickly.
Finding your editing style might take you a while, but once you figure it out, go ahead and make a folder of all of your editing elements. In Dropbox and on my external hard drive, I have those elements saved in a folder.
Unload files and make proxies the night before you’re going to edit
Like I mentioned – uploading massive video files and making proxy footage takes a while. I like to start that process the night before I want to edit, or at least a few hours before if I can’t swing a whole night. I leave it running on my computer while I’m doing other things so that it has the opportunity to finish before I need to work.
Now, add all footage to Final Cut Pro and apply any changes to ALL clips
With how I edit my YouTube videos, this generally looks like increasing the volume on all of the clips. I also do all of my color correction and white balance here, since that applies to all clips.
Film in a way that makes the editing easier!
Filming to make editing easier on yourself can be a great help! For example, when I make a mistake or get tongue-tied, I take a small pause. That way, I can see in editing where there is a lull in audio to make it easier to cut. If you wanted to, you could go through and edit those pauses out first and then go through the whole thing, or do it all at once.
Once you try this out, you’ll totally find a system that works for you. But keeping “editing you” in mind while filming can be a massive time saver later on.
You just need a strategy so that you know where cuts will happen. Whether that’s clapping after a good take or taking a pause or something else, figure out what works for you.
Something that I’ve just started doing that has helped tremendously is…
Editing in 2x speed
Disclaimer: I have tried this before in Premiere and it didn’t work well for me. But in Final Cut, it’s been tremendously helpful so far!
First, I import all of the footage, adjust volume and color on all clips, and then I speed up the whole video to 2x speed. Then, I go through and make my cuts. It makes the watching back process quicker, and I can still see those breaks to make cuts. Then, when I’m finished, I select everything and slow it back down to normal.
That literally DOUBLES my editing speed (as you’d expect, ha). If your software will handle it, you can definitely use that to speed up the process! But I would recommend trying it out on a smaller clip first to see if it works.
And that’s how I edit my YouTube videos! It takes me SO much less time now than it did four or even two years ago. I’ve learned a lot of time-saving tricks that have made it easier for me to edit.


+ show Comments
- Hide Comments
add a comment